Now that you’ve made an excellent choice of paving your driveway, I’ll simplify the steps involved in laying the pavers.
Well, there is a very expensive and time-consuming way ( basically, American way) of laying and then there is an Indian way of doing it the most economical way to get maximum results.
What way do you think we suggest?
You guessed it right! The Indian way!
Don’t think that Indian laying method produces poor quality work. It is just a quicker and a more practical way.
Things you’ll need
- Paver Blocks equivalent to the required laying area
- 6mm Aggregates(crusher metal) 40-50mm thick below the pavers
- Crusher Sand or fine river sand to spread over the laid pavers.
- Wooden/Rubber Mallet
- Earth Vibration Compactor of 5hp capacity
- Marble cutter(if you need to cut pavers)
- Earth removing Shovel (JCB if a huge project)
Step 1: Site Preparation
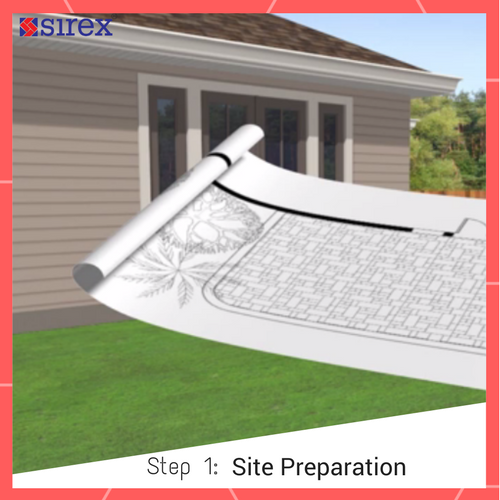
Contact the local utility providers to ascertain if there are any underground cabling or plumbing done. Identify the area that has to be paved
Mark line and levels.
To avoid water getting collected on the pavers, ensure pavers are at a slightly higher elevation than the surroundings. There should be a gradual slope away, starting from the base of the house.
Step 2: Excavating the area
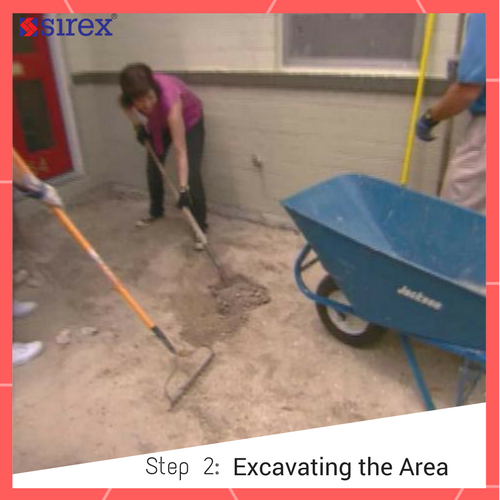
Earth can be excavated using a shovel or any suitable Earthmover depending on the size of the project.
The depth in which Earth is removed is dependent on several factors. You have to consider the height of the paver, base material thickness, slope required and the reduction resulting from compaction.
Ideally compaction (Vibrator compactor) takes place four times, 2 before laying and 2 after laying (will be explained individually during each step)
Note: Reduction in depth has to be calculated every time vibratory compaction happens.
Step 3: Preparing the Base
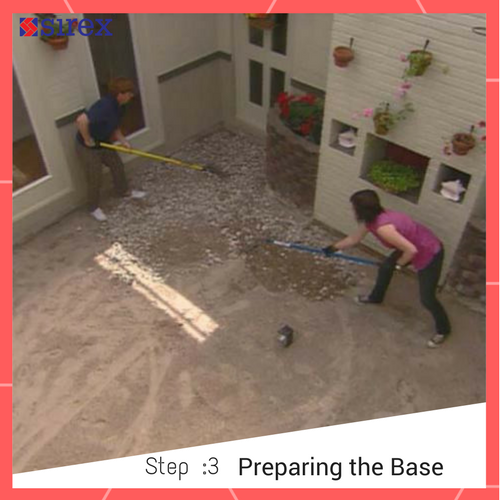
Once excavating earth is completed after keeping an account for the reduction during the vibratory compaction in the future stages, you need to prepare a solid base for Pavers.
The Earth is first vibratory compacted.
If the compaction is not done properly, settlement happens in the subgrade which will result in unevenness on the surface of the paved level.
A layer of aggregates (metal crusher) is laid which will act as the base for the final paved area.
For a medium vehicular traffic area, 40-50mm of 6mm aggregates would be sufficient.
After spreading the aggregates evenly, it is vibratory compacted again. Repeat the compaction process until you achieve the height you desire. A well-compacted base provides structural integrity and drainage to the final paved area.
It is common for people to add a thicker base of aggregates and a sub layer of bedding sand. From our decades of experience, we are convinced that this addition isn’t necessary.
Also, concreting the base might appear to be increasing the strength of the base, but it restricts water percolation and the whole purpose of paving blocks is lost.
To keep the costs in control and to avoid blocking water percolation, we suggest you go by the method we recommend.
Step 4: Laying Pavers
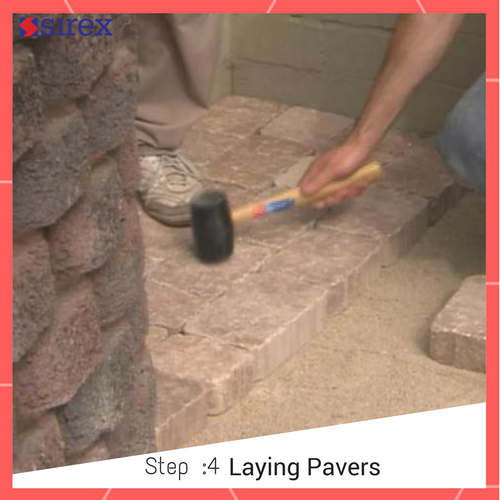
Start laying the selected pavers one by one, starting from the longest straight edge near the base of the building. Use a wooden/rubber mallet to firmly place every paver.
Place the pavers straight down, Do not slide them or kick them to place.
Also, Walk only on the paved area while laying is taking place.
Check periodically to ensure the straight level of the surface.
Vibratory Compact the surface again once laying is done.
Step 5: Cutting Pavers
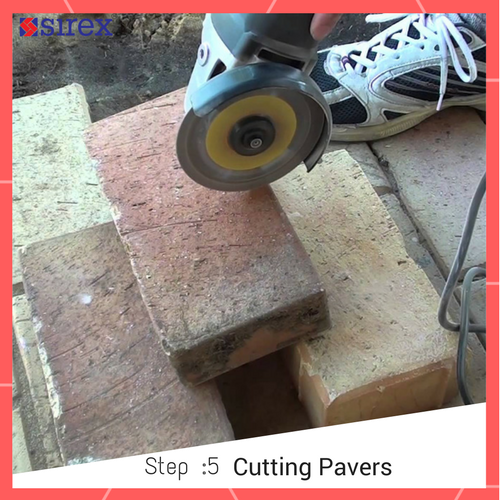
Cut the pavers accordingly to fit them to the edges. Don’t curve/push the pavers just so you can adjust without cutting.
Use a Marble cutter to cut the pavers. Wet the pavers while cutting to ensure the heat generated and dust formed are subsided.
Preferably, cut the pavers slightly away from the site.
Step 6: Spread Sand over the paved area
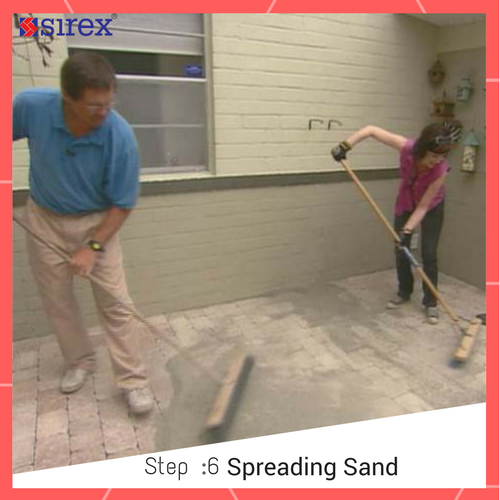
Use 2mm crusher sand to uniformly spread over the laid surface. The sand must be sufficient enough to fill the space between the pavers. Sweep the sand to push it to the gaps.
This is a very important step as the sand between the pavers ensures friction that enables interlocking property of the pavers.
Step 7: Final Compaction

After pushing sand to the gaps, sweep away the excess and conduct a final compaction. Since there could be minute sand particles still remaining on the surface, you must attach a rubber pad to the bottom of the compactor.Or cover the base plate with 3 layers of gunny bags.
Step 8: Edge the Restraints
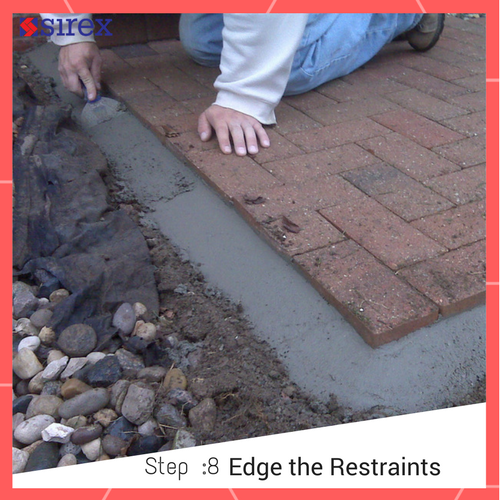
Use a small amount of mortar mix or kerbstones to restraint the edges from pushing outward in the future.
This is not a compulsory step as in most cases there would be natural restraints to restrict the outward movement.
Even though all the steps mentioned above might not be extremely difficult to Do-It-Yourself, we suggest professional laying contractors since it might be a bit difficult to find the appropriate tools required to complete the process.